Today I’d like to show you how to add analog warmth, saturation and color to your sampled orchestral strings in order to make them sound even more authentic and help to make them sit better in a crowded mix. To accomplish this, I want to use the highly praised effects of analog tape and tape simulation.
ORIGINS OF ANALOG TAPE RECORDING
While recording to tape is a technique used in the glorious old days of analog studio recording, there’s an ever-growing crowd of analog gear enthusiasts who are committed to analog tape and its musical effects on practically any signal. While digital was the only way to go for some recent decades, most larger music productions of today now undergo an analog tape treatment somewhere along the process. Since today, there are only few flawlessly working, reliably operating professional tape recorders available, they come with an impressive price tag and therefore are most likely restricted to large studio facilities only. Nevertheless, over recent years, a huge trend of digitally emulating analog hardware emerged in the recording world to make the pleasant effects of those devices accessible to home and bedroom producers, too.
TAPE SIMULATION PLUGINS
Now back to our sampled strings! Since I unfortunately don’t own a studio-grade tape recorder either, I’m going with a digital plugin alternative here. There are plenty of tape simulation plugins available (see further below), but for this task I’m using Softube’s brand-new tape sim TAPE, which was released in June. Most of the other tape simulation products have similar controls and will surely get the job done just as well, but obviously there might be some subtle differences in function and quality.
Before we dive into the actual analog warming processs, let me quickly give you a rundown on the features of Softube’s TAPE plugin. If you know the plugin and its controls already, please feel free to skip ahead to the next section.
SOFTUBE TAPE
Swedish audio soft- and hardware company Softube is a brand well-known for authentically and precisely recreating the vibe of analog gear and putting it into easy-to-use plugins. After celebrating huge success with their emulations of analog hardware like Tube-Tech’s CL 1B compressor or Summit Audio’s Grand Channel, this time they decided to create a faithful emulation of a studio tape machine. Softube modeled every important aspect of three renowned tape machines, including their circuits, mechanics and the tape itself.
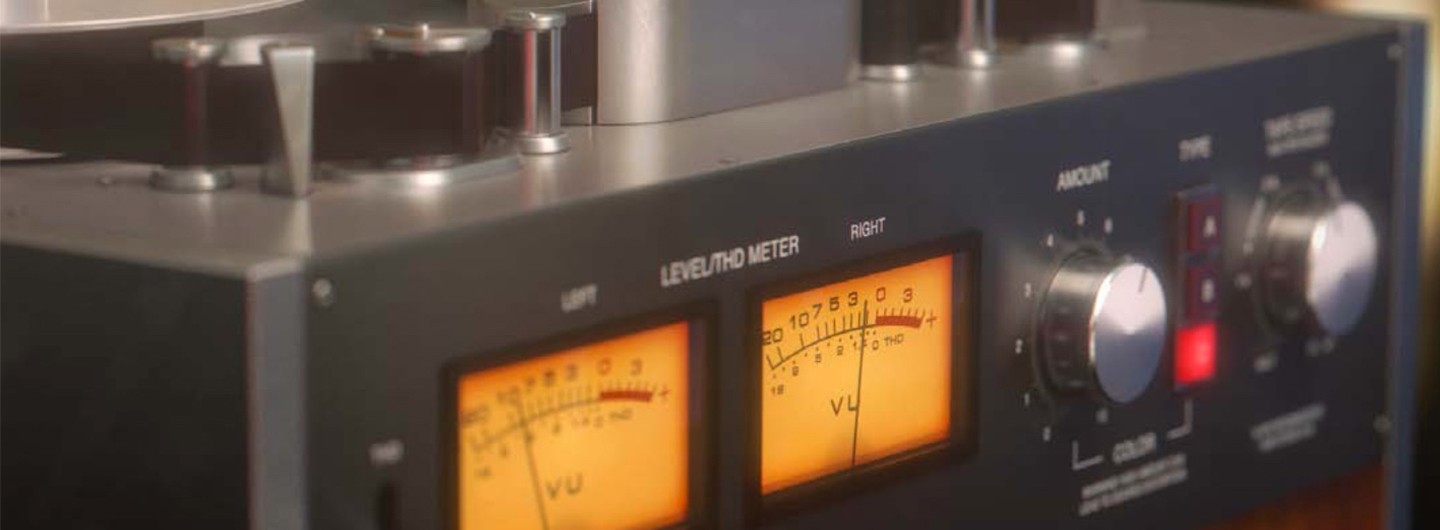
TAPE’s photo-realistic interface provides only the most necessary controls as well as a generously sized level meter.
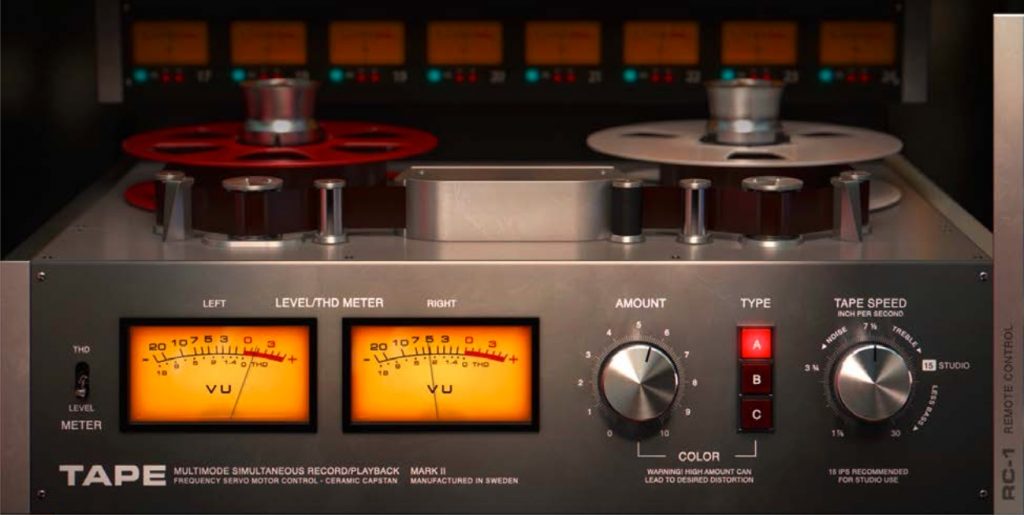
Starting from the left, you’ll find an analog-style VU meter which can be switched to display the amount of THD (Total Harmonic Distortion) the tape sim adds to the clean signal. The big rotary control labeled “Amount” works in conjunction with the three accompanying tape machine type options and controls the amount of saturation and colorization added to the signal. The “Type” buttons to the right let you choose between three different tape machine styles, modeled after renowned machines that are still widely used today. Type A is modeled after a swiss Studer tape machine, probably one of the A80 or A800 models. Type B probably is the emulation of a transformer-based Ampex tape machine, which tends to add some nice low-end weight to signal, depending on how far the tape is getting driven. Type C is described as the emulation of a British tape machine with a distinct vintage vibe and might possibly be modeled after a classic EMI tape recorder, used by George Martin and The Beatles.
Next to the Type switches you’ll find another essential control of analog tape machines, the tape speed dial. The Tape Speed control lets you step between five simulated tape speeds, each one introducing different effects on the signal. While tape speeds of 15 IPS and 30 IPS are professional studio standards and provide the most balanced tone, tape speeds of 7 ½ IPS and below are usually used to emphasize a signal’s low-end and punch and to feature warmth and fatness.
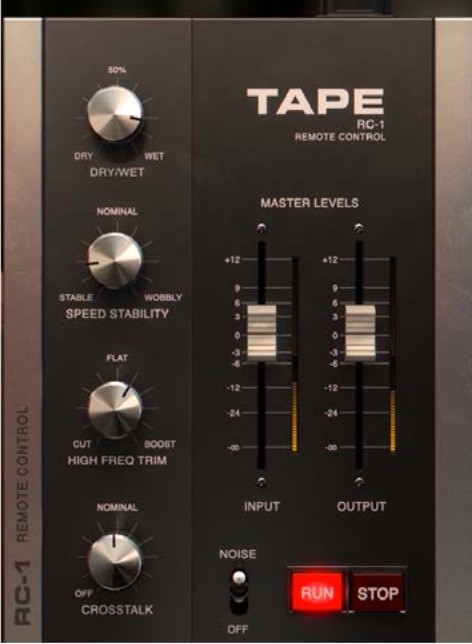
At the far right corner of TAPE’s interface, you’ll gain access to more controls by clicking on the metallic frame labeled RC-1 Remote Control. Here you can find standard controls like a wet/dry mix and two faders for the input and output level, but there are more specialized controls to be found, too. Speed Stability controls the amount of wow and flutter which is usually introduced through a tape’s wear and tear. Used in conjunction with the wet/dry control introduces awesome sounding vintage-style flanger effects. High Frequency Trim allows you to either add back some high frequencies that might have gone lost with extreme saturation settings or lets you darken down the signal if gets to fizzy and bright. Obviously, in order to create authentic vintage-style sounds, you might want to cut some of the signal’s highs using this control.
Directly below, you’ll find a so-called Crosstalk dial. This control emulates the effect of magnetic tape crosstalk which is – depending on the tape model used – more or less apparent in the analog world. It introduces a kind of crosstalk or interaction between the two channels of a stereo source which results in a slight change of the stereo image and width.
Lastly, TAPE provides you with a switch for turning on or off the increased noise floor introduced with tape and a fancy Run/Stop control that lets you perform fancy tape stop and start sounds.
ADDING ANALOG WARMTH TO SAMPLED STRINGS
While in order to accumulate the effects of analog tape, tape simulation is usually used on each and every channel and then again on the submix. However for demonstration purposes I only use one instance of TAPE on my track’s string bus. I want to treat the whole string section as one a group and make it sound coherent. This is how my unprocessed string section sounded like in the beginning:
String Ensemble Unprocessed
I turn up the Color Amount to 100% since I really want to hear and play with the saturation effects of TAPE. I stay with the standard studio tape speed of 15 IPS although I occasionally do tend to switch to 7 ½ and 30 IPS, too, to see what they do to the signal. On the Remote Control tab, I set the wet/dry blend amount to 100% wet and leave Speed Stability and High Frequency Trim at their default positions. I turn the Crosstalk up a bit to get some interesting sounding interactions between the channels that result in a slightly enhanced stereo image. This is what it sounds like with the tape simulation on:
String Ensemble Processed (Type B, 100% Amount, 15 IPS, 50% Crosstalk)
Although the difference may be subtle at first, this combination of settings gels everything nicely together so the sum of string instruments appears more like a coherent unit. Also, the fast spiccatos in the track tend to jump out less and stick to the strings unit more tightly.
The Type B color setting slightly tames the upper mids, and nicely emphasizes the section’s high frequency sheen. It also adds a certain kind of low-end power to the strings that isn’t reproducible just by boosting the lows on an EQ. I also added some “Crosstalk” to the signal, which slightly enhanced the strings’ stereo image and width. I usually don’t go farther than about 40-50% Crosstalk amount, since I feel it can mess with your correlation and phase if driven too far.
The Type C setting imprints even more of a smiley face type of frequency image on the section, where the lows and highs are accentuated, while the mid frequency spectrum is noticeably set back.
String Ensemble Processed (Type C, 100% Amount, 15 IPS, 50% Crosstalk)
For my taste, the Type B setting imparts the most pleasurable effects to our strings, since it slightly compresses the signal and glues all the individual instruments nicely together, while nicely reducing the upper mid sharpness and honkiness. The low end enhancement adds a bit more weight to the basses and celli while the highs appear more rounded yet they retain a pleasant shimmer.
The tasteful taming of upper mids ranks among my favorite side-effects tape saturation has to offer. With orchestral music in particular, there are so many instruments and instrument groups that fight for attention in the mids. Depending on your orchestration, a mix can quickly become quite honky and mid heavy so sections like the brass and strings are particular candidates to keep an eye on. Before reaching for the EQ and cutting mids relentlessly, it might be a better idea to use tape saturation’s mid dip to receive a much more organic and musical result.
I also printed one version of the strings with the Crosstalk turned up to 100% so you can hear the control’s effect in full glory:
String Ensemble Processed (Type B, 100% Amount, 15 IPS, 100% Crosstalk)
Depending on which speed setting you use, you might run into a situation where your string section gains the desired feeling of oomph and compression, but feels a bit dull in the high-end. This can easily be made up for by reaching for the Remote Control tab and adding back some highs with the “High Freq Trim”. In contrast, should your strings get too harsh and bright during the saturation process, this is the place where you can darken them down if needed by dialing back the rotary control.
TAPE SPEED FATTENING TRICK
A little trick when dealing with basses and celli: With instruments that usually live on the lower side of the frequency spectrum, you might want to check out lower speed settings like 7 1/2 IPS or even lower. Traditionally, those speeds were used to emphasize the low-end of an instrument or mix, which is why they are often used as the setting of choice for electric basses, kick drums and toms.
Basses & Celli Unprocessed
Basses & Celli (Type B, 100% Amount, 7 1/2 IPS, 50% Crosstalk)
While you might lose some high-end, you can easily dial it back in with TAPE’s High Frequency trim. Keep an eye on the noise floor though, because lower speed settings tend to introduce more artifacts when driven hard. This might of course be just the treatment you need in some cases.
OTHER TAPE SIMULATION PLUGINS
There are, of course, other tape simulation plugins on the market that can achieve similar results. Among those are:
-
Slate Digital VTM Virtual Tape Machine (
$149.00) -
Waves J37 & Kramer Master Tape ($69.00 / $49.00)
-
Universal Audio Studer A800 Multichannel Tape Recorder ($222.00)
-
U-he Satin ($129.00)
-
FabFilter Saturn ($154.00)
If you want to check out the effects of tape saturation and coloring without spending any money, you might as well try one of the many freely available plugins out there or just check your DAW’s stock plugin collection. Most sequencers nowadays got plenty of high quality plugins on board already! Depending on which DAW you’re on, definitely go check out Cubase’s “Tape Saturation”, Ableton Live’s “Saturator” or Logic Pro’s secret tape saturation effect hidden in the “Tape Delay” plugin.
Surely there are many ways to treat sampled orchestral strings to make them sound more organic, coherent and realistic including proper EQing, tasteful compression, imaging and – of course – orchestration. While those topics will be covered in future tutorials, I hope this short dive into tape saturation will help you enhance your compositions and orchestral mixes.
If you’re interested in getting Softube’s fantastic new TAPE plugin, you can go to the company’s online store and download a free 30-day trial (iLok required). TAPE is available for an introductory price of $79 (regular price $99).
0 comments on “Adding Analog Warmth To Sampled Strings Using Tape Simulation”